Friday, December 20, 2013

Geo Princess Mimi (Bambi) Apple Green Review!

Since it was almost Halloween (I know this post is like 2 months late) when I ordered this pair of circle lens, PinkyParadise had a special on shipping.
This year for Halloween, I wanted to do a Dark Little Red Riding Hood. So my original plan was to have one "normal" green eye and the other being red. But I ended up just getting a pair of green circle lens.


On with the review!


Brand: Geo Princess Mimi Apple Green (Bambi series)
Color: Green with yellow center and black outer rim
Diameter: 15.0 mm


Because they were having a special on express shipping, I did receive my contacts about two days before Halloween. Which was perfect since I had at least one day to try them out.
The lens themselves cost about $23.90 and plus express shipping, they came out to be $34.80.
Yes, that does mean that express shipping was only $10.90. Which is of course pretty cheap for express shipping. Originally, the total would've came out to be abut $40-$50.


Although I love how Maplelens has faster shipping, PinkyParadise just so much more selection when it comes to prescribed lens.


Picture Time!

*All pictures were taken under bathroom lighting.*


Super cute lens case! I finally got a bear! :D (I don't like how its yellow though.)


How the lens look on brown eyes (Far Away)


Close up


How they look in the case

  • Color: 10/10
    • I love how natural the color looks on my dark brown eyes. They're vibrant enough that you can tell they're green but not enough to make me look freaky.
  • Comfort: 10/10
    • Despite them being 15.0mm which is .5mm larger than previous lens that I've purchased, they're pretty comfortable. Of course since they're a bit larger than what I'm already used to I had to get used to them for the first hour I wore them when I tried them on before wearing them for Halloween.
  • Enlarging: 10/10
    • With the lens being 15.0mm, they are pretty enlarging since like I said, they're bigger than what I'm used to. When I first put them on after letting them soak for the 8 hours you're required to do so, I joked how I looked like an alien since I didn't have any makeup on to make the lens look a bit more natural.


Like always, I'm not being paid to do this review.


As for the makeup I'm wearing in these pictures:
Eyebrows: E.l.f eyebrow kit in Medium
Eyes: Nyx Jumbo eye pencil in Black Bean, Etude House Tear eyeliner in Pearl tear, and Maybelline Clear Mascara


Bottom line, I'm glad with this purchase. So far, I've been liking each and everyone of the circle lens I've been purchasing and hopefully that will continue to be the case. I will be putting up new posts before Christmas rolls around (Oh my gawd, that's next Wednesday..). Two of the posts will be about recent orders I've received from PrettyandCute and areyouaniceguy.com (Wongfu Productions).
My last announcement is that I will be getting my hair done tomorrow by my cousin who has recently moved up here from California and that will be what the other post is about. :)
If I don't get all three done by Christmas, they will for sure be up before the end of the year.


One last picture:
Happy Holidays! :)


Hope this was helpful to you!

Monday, November 4, 2013

How to make Realistic Cuts (Makeup Tutorial)

I know this is too late to do for Halloween but this can be used any time you want to have fake cuts!
I did honestly have to look up how to do this online and came across the wikihow on it.
(So, I didn't come up with this on my own.)

http://www.wikihow.com/Make-Fake-Cuts-Using-Makeup

Now onto the tutorial!


Things you will need:
Black face paint crayon, Brown eyeliner, Red face paint, Pure Red lip gloss, old Black eyeliner, Eye shadow smudge brush, pink or rose blush, brown and black eye shadow


Step 1: Use a black face paint crayon to outline where you want your cut to be. Keep in mind that cuts are not always perfectly straight lines unless its a paper cut. Make it so that there are some places that are thicker than the rest of the line.


 Step 2: Trace the black line with the brown eyeliner. This will help make the red look more like aged blood inside the cut.

Nyx Liquid Brown Eyeliner.


Step 3: Go over the line with the red face paint. When doing this, you can go ahead and go outside of the line a bit.


Step 4: Go over the line and red face paint with a Pure Red lip gloss. This will give it the appearance of fresh blood. Make sure the lip gloss does not have any sort of shimmer or glitter of any kind, just gloss. Keep in mind that the applicator will get messy after doing this makeup, so you should either clean it after or not use it on your lips.

Nyx Mega Shine Lip Gloss in Perfect Red


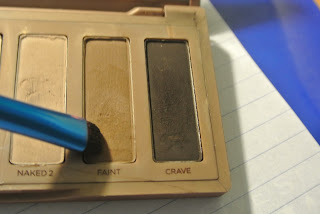
Step 5: Take the brown and black matte eye shadows and place this combination only on the parts where the black line is thicker than the rest of the line. Near the parts where the line is thinner, place only brown eye shadow.

Naked Basics Palette: Faint and Crave
Sephora Smudge Shadow brush


Step 6: Use matte pink blush to blend out the brown and black eye shadow. This gives the surrounding skin a swollen look. Smudge out the edges to make it look much more natural looking.

Nyx Blush in Mocha


Step 7: Using an old Black eyeliner, trace the black line again. Then use the red lip gloss to blend it out so that the black blends into the red to show depth in the cut. The reason why is has to be an old black eyeliner is because when it dries, it starts to crack.

NYC Liquid Eyeliner in Pearlized Black


*Note: Your new "cut" will not dry, so you do have to be careful not to touch or smudge it.*


How to Remove:

Step 1: Use a cotton pad or tissue to wipe it off. Since the eye shadow is powder, it will not come off just by wiping it.


Step 2: Use a makeup remover or oil cleanser to clean off the eye shadow and whatever is left off.


My costume:
Dark Red Riding Hood
The make up I did was just a simple pin-up with Maybelline Color Whisper in Who wore it Red-er.
I'm also wearing Geo Princess Mimi (Bambi) Apple Green circle lens. ;)
[Review to come soon!]


You can use this for any sort of costume that involves cuts, scratches, scrapes, and even bruising! Of course for bruising, you have to add a purple or blue eye shadow to show broken blood vessels under the skin. Remember to just have fun with it and it doesn't have to be perfectly like the ones you see in pictures.


Hope this gives you an idea for next year! :)


Friday, November 1, 2013

ATTENTION UKISS KISS ME!

To all UKISS KISS ME!
According to the M Countdown (Global) website, UKISS is second.
Which means, they're so close to getting number 1! We have to keep voting for them so they can reach their dream. Plus it'll be a good gift for AJ since he's going back to Uni early next year!

*I do not own this picture*
UKISS 8th Mini Album


Also, we have to vote for them on eatyourkimchi.com


VOTE FOR UKISS SHE'S MINE!


Although it's not as important as them winning number 1 on a music show, it still matters to other KISS ME to see what Simon and Martina think about the song. (Plus I want to see if they think it fits with UKISS' other songs).
If you didn't know already, M Countdown is selling signed CDs on their shop for $12.99!
Any way, vote for UKISS on M Countdown and eatyourkimchi.com (if you want to hear a review). :)

Let's help UKISS reach their dream of winning number 1!


UKISS FIGHTING! <3

Friday, September 27, 2013

Outfit of the Day: Airport Fashion (Hawaii Edition)

I've decided to finally have a new series of posts for my OOTD or Outfit of the Day. I don't think I'm that fashionable. I basically wear anything that looks nice together and is comfortable.
So, my very first Outfit of the Day is my Airport Fashion. Not just any airport fashion though, but Hawaii edition. ;)
Not only will I show you guys my outift and wear I bought the pieces, but I will also explain why I chose the pieces. (I'm only explaining in this one to let you guys know what kind of outfit would be airport friendly).

Overall view of my outift.

Cardigan:
Explanation: It may be cold during the plane ride and in the airport while I'm waiting to board.

Top:

Explanation: Wearing a tank top will allow me to cool myself down by taking off my cardigan and scarf when we land in Hawaii.

Scarf:

Explanation: I'm not for sure on whether I should bring this or not. I would just in case it's pretty cold when I come back. But I wouldn't because it's just one more thing to carry around.

Jeans:
Explanation: I'm always comfy in jeans. Plus it's a good thing to wear when I come back when it's cold.

Shoes: I don't have a picture. But I'm either going to wear my converse or my combat boots.

Explanation: I want to wear my converse because they're easy to walk in but since they're high tops, they're going to be hard slipping on and off for security at the airport. My combat boots are both easy to walk in and are easy to put on and off but I probably won't be wearing them while in Hawaii.

Luggage:
My actual luggage with my clothes and shoes. 

My bag with my electronics and wallet.
(Yes, that is Felix the Cat.)


Hope you guys enjoyed my first installment of my Outfit of the Day series.
I would've taken I picture with me in the outfit, but that would mean I wouldn't have anything to post until later today. I may do a video for the rest of my OOTD. Maybe... Anyway, Please comment, share, like! :)

Thinking about a video to go with this.
<3


Wednesday, September 25, 2013

What's in my Travel Makeup Bag? (Hawaii Edition)

I still don't have enough courage to post a video up on YouTube so I decided to just do a blog post for this.
As the title says, this is my "What's in my Makeup Bag? (Hawaii Edition)" post.
I will probably do a "What's in my Bag?" post some time in the near future.
Anyway, on to the post! This is all of the makeup I've decided to bring with me to Hawaii.

This is my makeup bag that I bought from Daiso.

For those who don't know, Daiso is pretty much a Japanese dollar store. But instead of everything being a dollar, everything is $1.50 (excluding certain products that are $3).

As you can tell from the picture, my makeup bag is divided into two sections. One section I keep tools and a few makeup products while the other section, I just keep makeup.


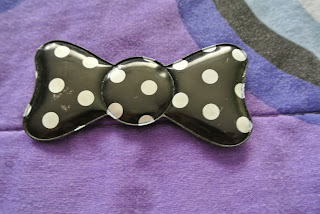
Velcro Hair Bow I got from Prettyandcute.com has a freebie


Mini Claw Clip


Mini bareMinerals Kabuki brush


Eyelash Curler, also from Daiso


Bosica Green Tea Oil Blotting Linens


Revlon Nearly Naked Pressed Powder in Medium


Elf Eyebrow kit also in Medium


Dollywink Eyelashes in #9 Natural Dolly


Nivea Lip Butter in Raspberry Rose Kiss


Smashbox Photo Finish Primer


Urban Decay All Nighter makeup setting spray


Next, on to the next section!

Maybelline Baby Lips (Left: Quenched Right: Cherry)


Sample size of Benefit They're Real mascara


Too Faced Shadow Insurance


Nyx Liquid Eyeliners (Left: Collection Chocolate Brown Right: Collection Noir Black)


Maybelline Great Lash in Clear


Revlon Colorstay Ultimate Suede Lipstick in Socialite


Rimmel Waterproof Kohl Scandal Eyes eyeliner in Nude


Nyx Jumbo Eye Pencil in Strawberry Milk


Maybelline Fit Me Concealer in Medium


Maybelline Instant Age Rewind Eraser Dark Circles Under Eye Concealer in Medium


Sample size of Watt's Up! Highlight by Benefit


L' Oreal Infallible Eyeshadow in Amber Rush


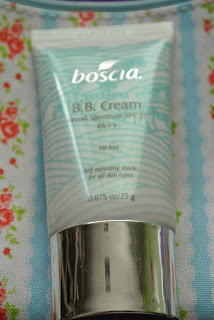
Travel size Bosica B.B. Cream


Some extra products that couldn't fit into my makeup bag would be:


Yes to Cucumbers makeup wipes


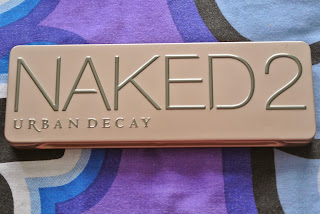
Urban Decay Naked 2 Palette


Urban Decay Naked Basics Palette


Planning to post a not tutorial on the makeup look I'm going to do for Hawaii. So please look forward to that. ;) Also if you guys want me to review any of the products mentioned comment below or like this post and a review will be posted ASAP.

Hoped you guys liked this!
<3