Thursday, June 18, 2015

Updated Simple Everyday Makeup Routine!

Hello everyone!


Yeah, two post in one night!! On a roll! Let's keep it that way. . . .
As in posting regularly not putting up more than one post.


As the title implies, here's my updated everyday makeup routine. It's very simple and fresh!


After I wash and moisturize my face. . . . . . .
I go ahead and apply this concealer to my under eyes for my more rested look.

Maybelline Instant Age Rewind Eraser Dark Circles Concealer


Then I take an angled eyeliner brush and my dipbow pomade to fill in my eyebrows just enough to make my eyebrows actually visible and not so sparse.


Anastasia Beverly Hills Dipbrow Pomade in Medium Brown


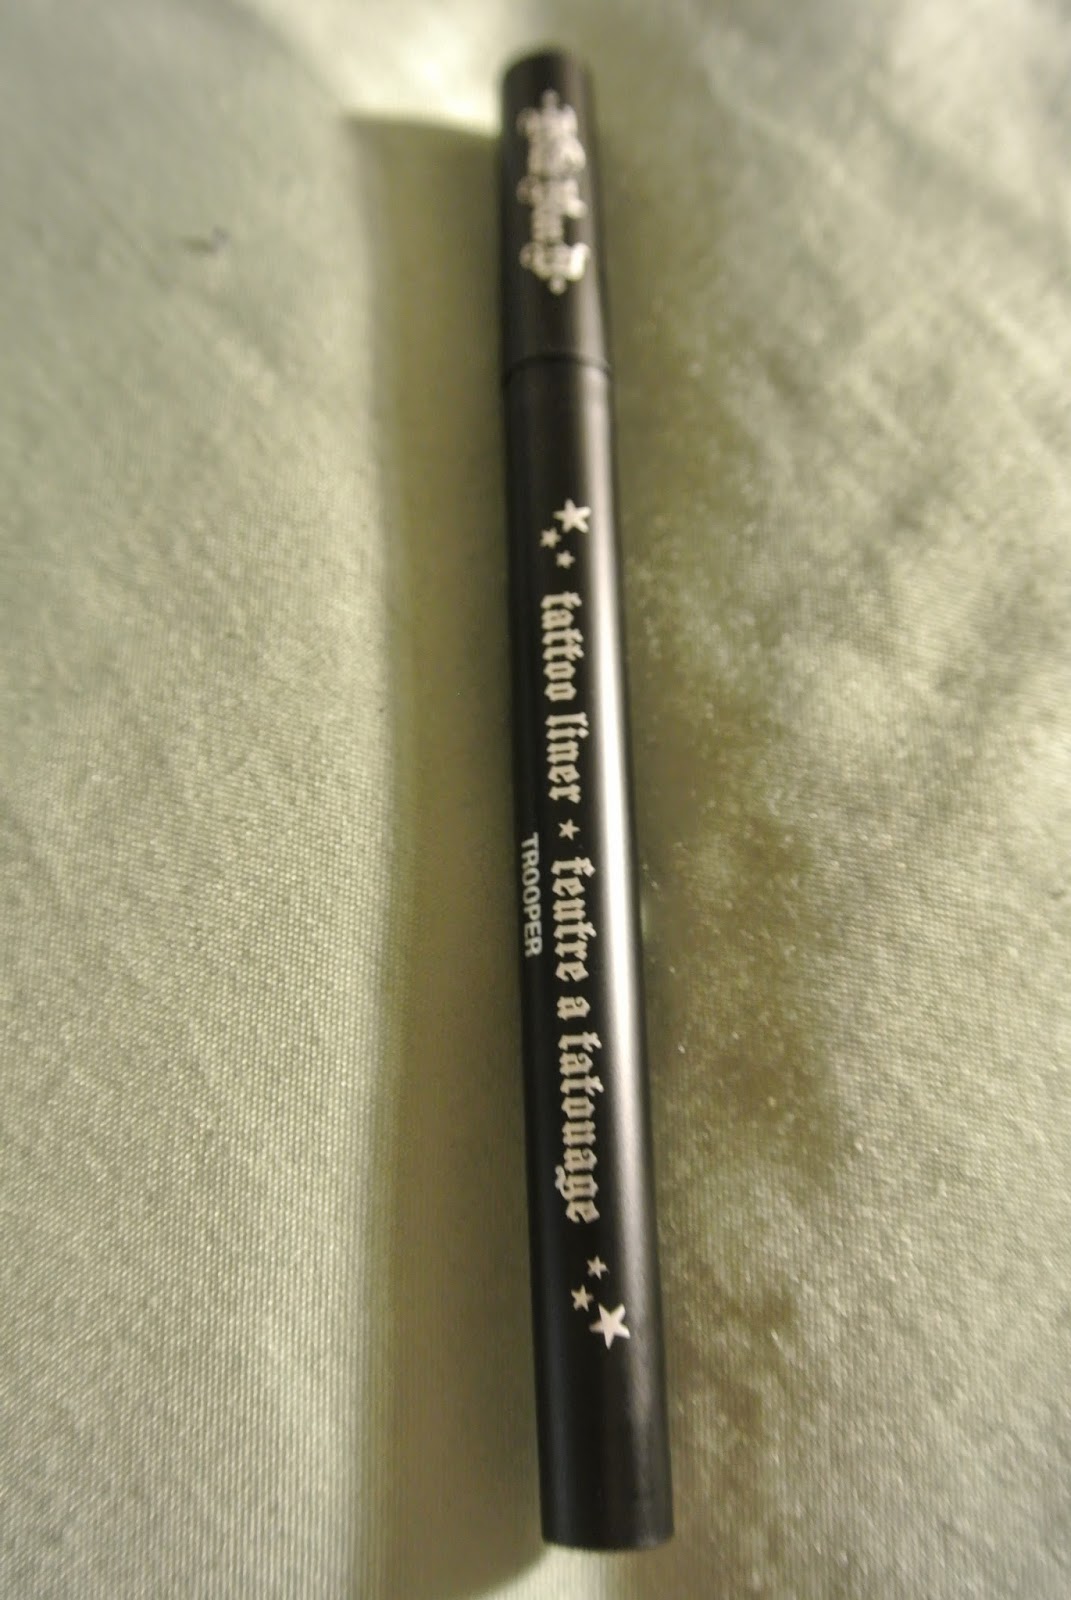
After that, I line my eyes with my current favorite eyeliner. I just follow the natural shape of my eye with a small flick at the end.

Kat Von D Ink! Liner in Trooper (Black)


Taking a black pencil liner, I just line the outside corners of my eyes connecting to the small flick I made with the liquid liner.

Makeup Forever Aqua Eyes in Black


Using a pearl pink liner I just add this to my inner corners of my eyes to highlight. This and adding the liner to the outer corners give me a more innocent and and teary-eyed look.

L'Oreal Silkissme pencil liner in Highlight


Finally, I do a gradient lip with this orange lip tint I got recently from the Face Shop.


The Face Shop Enamel Coating Tint in Enamel Orange


And the look is complete! ^^"


I love adding this orange as a pop of color to my makeup because it just makes my face look more refreshed and awake. It's also a good color for the summer time and goes well with my medium skin tone. This look is very simple because I love sleeping until I actually really need to get up and get ready for school. So, my makeup routine can't be too long or else I'll just be in a rush. I don't include any other face makeup other than the concealer because I'm currently on a "journey" (topical medication) to get rid of my acne both on my face and on my body. I don't want anything clogging my pores and interrupting that process.


Oh, I also have a video on my YouTube channel where I actually show how I do my everyday makeup.


Hope you liked this post and check out my video!


Mini The Face Shop Haul

Hey guys!

So I just came back from San Diego last Monday on the 8th of June. I found out there's a physical The Face Shop store there and I knew I just had to go there. It was also the only places I could think of to get my friends something as a sort of souvenir since Korean cosmetics isn't as accessible to us here in Seattle.


Starting off with the things I bought my friends. . . . . . .


 Black Sugar Scrub: 
peeling exfoliator which lets you see your dead skin come off.


My friend wanted this because it's much more gentle on the skin as compared to exfoliators with beads. Plus she thinks it's really cool to see the dead skin come off. ^^


(I DO NOT OWN THIS PICTURE)
Calming Seed 1 second calming toner:
spray on toner which claims to calm sensitive skin


I bought this for my other friend because we're both taking antibiotics and a cream for our acne. So I thought since the cream might becoming irritating, I should get her skincare that's calming and lightweight.   


The one and only thing I bought for myself:


Enamel Coating Tint:
Lip tint with a creamy consistency
Color: Enamel Orange


Now to the fun part! Samples!!!!


Olive Essential Cream:
Offers intense moisture and absorbs quickly while hydrating skin for hours.


Baby Leaf Green Tea Toner & Emulsion:
Moisturizes skin without the sticky feeling


Since in total I spent over $50 I got to pick a free gift!


Herb Day Lip & Eye Remover:
Makeup remover for sensitive skin


That's all I got from The Face Shop in San Diego. Currently loving the lip tint I bought for myself. I also loving going into Korean cosmetic shops because the look of the shop itself and the number of samples you can get! I'm pretty sure if I asked, the lady probably would've gave me more. After this, now I really want to go to Korea and shop for other cosmetics!


Hope you enjoyed this post!

Friday, March 27, 2015

Sephora Haul!

Hey everyone!


My birthday was on March 7th and this year I turned 21! Yay!!!
As my birthday gift, my brother bought me a gift card to Sephora. I actually took a little while to decide what I should spend it on. So here is a mini haul for you guys!


To start off with, when I placed my order I was able to choose three samples:


Fresh Lotus Youth Preserve Eye Gel- 0.06 floz


Glam Glow Daily Clearing Cleanser 0.10 oz


Nude Perfect Cleanse omega cleansing jelly


Then you have a choice of choosing if you want to put in a promo code. So I got:

Originally I wanted to get this lash serum if I chose to put in "LASHFOOD" but I guess they ran out so I ended up getting Murad.

3-Day sample of Murad Acne Clearing Solution- 3 x 0.045 floz


I'm a Beauty Insider so for my birthday I chose to get:


Peter Thomas Roth
I chose this birthday gift instead of the Nars Lippies because I felt like I wouldn't use them.

Ant-Aging Cleansing Gel- 2 floz


Cucumber Gel Mask- 0.5 fl oz


I also chose to use some of my reward points and got:


Beautyblender Solid Cleanser- 0.558 oz
This cost 100 points and I chose it because I bought a bautyblender.

Ole Henriksen Truth Serum Collegen Booster- 0.25 fl oz
This was also 100 points and I chose to get this to give it to my mom.

Now onto the things I actually bought:


Beautyblender Pro which is the black one. 
Usually you get this one to use on makeup that might stain your original beautyblender.
I bought this because this is actually my very first regular sized beautyblender. I already have a knock-off one I bought from Marshall's for $5 and the mini beautyblenders.

Ole Henriksen pure truth melting cleanser- 1 fl oz
I actually tested this product when I went into the store one day and I loved how easy it was to take my makeup off.


bareMinerals Complexion Rescue in Natural 05- 1.18 fl oz
Lately I've only been wearing BB Cream and CC Cream instead of foundation and I chose to get this for those days I want something even more lighter.


I ended up going to Sephora a couple days ago and bought a back up of my Kat Von D eyeliner but in the original tattoo liner which is a brush tip rather than the ink! liner which is a felt tip.

Kat Von D Tattoo Liner Trooper- 0.02 fl oz
This is a re-purchase and I actually want to compare the application to the felt tip ink! liner.
I love this eyeliner but I do want to try the Stila eyeliner and the Dollywink eyeliner as well. Maybe once I get those two, I'll do a comparison between all three!


That is everything I bought from Sephora. I hope you enjoyed my mini haul!


See ya!

Monday, March 23, 2015

EOS Ice Blue Review!

Hello!~

I'm back and I have numerous posts I need to put up. Lately I have gotten caught up in focusing more on my school work and now it's finals week and all I have left to do is to turn in my final essay and then I'm done! So, hopefully that'll mean more posts for you guys! I also have "A Look At" video for these lens here:


Some upcoming posts/videos:


  • Sephora Haul
  • "In a Hurry" Makeup
  • Daily SkincareRoutine
  • Announcement!

With that said, let's get on with the review!


So, I've previously done a review on the EOS Ice Grey lens. Since they are in the same line, I feel exactly the same for these ones as I did for the grey ones. If you haven't read my review on those ones, here is the link:


Just like the grey ones, I purchased these ones off of Maplelens.com


But unlike the grey version of these lenses, I do love the pigmentation of the blue ones much more. I feel like the pigmentation is natural enough for me to wear on an every day basis. As opposed to the grey ones which just looked black unless you were to look directly into the light source which is a no no for the eyes. The pigmentation is more of a true blue compared to the Geo Angel Blue lenses that I review when I first set up my blog.

Info:

Prescription: Left: 2.75, Right: 2.50

Diameter : 14.8mm
Water Content : 38%
Base Curve : 8.8mm
Life Span : 1 Year Disposal


In all honesty though, I love this series and it is very likely I will be getting other colors as well. I've had my eye on getting the green ones. The EOS Ice series is very thin so I feel like they're very comfortable. They also give you a cute teary eyed effect and with the right kind of makeup, make you look very innocent. I think the only down side is the water content which is only 38%. The water content pretty much determines how long the moisture will last when the lens is in your eye. Higher water content equals more moisture.


Rating (out of 5):

Comfort: 5
Like I stated above, these lenses are really thin which is why I thick they're really comfortable. But since they are so thin, you have to be careful when handling them especially if you have long nails. I have actually ripped a lens before.

Enlargement: 5
Since the diameter is 14.8 mm, I feel like that's a comfortable size for my eyes. Anything bigger is just too much, like the Geo Bambi lenses. I feel like anything that's 15 mm or bigger makes me look like an alien. 

Pigmentation: 4
Since I do like my circle lenses to look more natural, I love the pigmentation of these lenses because they're more natural but you can still tell what color they are. If you want something more vibrant, I suggest you not to get these.


I'm sorry this review wasn't something you were probably expecting.

Thursday, January 15, 2015

New Video!

Hey everyone!

As you may notice, I'll always have a post up announcing that I've uploaded a video. Now that I'm trying to upload on here every Tuesday and on YouTube every Wednesday, these upload announcements are not included as my weekly post. I just thought I would let you all know that.

Anyway, I've uploaded a new video on my YouTube!


Check it out!


Just thought I'd give you guys an update! ♡

Tuesday, January 13, 2015

Current Everyday Makeup

Hi everyone!
This is going to be my current everyday makeup as in what I use, not my makeup routine.
But by the order of the products is the order I put them on. I will upload a current makeup routine on my YouTube channel, just not right now.


A little bit of info on my skin:

  • Combo to Dry
  • Acne Prone
  • Light Medium skin tone 


So here are all the products I use!


First off, concealer for those Panda eyes!


Product: Maybelline Instant Age Rewind Eraser Dark Circles
How I use it: Apply under eyes in a triangle shape and blend out with ring finger
Color: Neutralize


Next, CC cream!


Product: Lioele Dollish Cera-V CC
How I use it: Pump onto back of hand and dot all over face and blend outwards.
Color: White but blends to skin tone.


Time for Foundation!


Product: bareMinerals Bareskin Serum Foundation
How I use it: Shake. 3 drops on back of hand and dot all over face. Blend with Real Techniques Expert Face brush and blend outwards. 
Color: Bare Beige


Minimal Eyeshadow!


Product: Urban Decay Naked Basics
How I use it: Use my ring finger to pat and blend all over lids to set foundation and concealer.
Color: W.O.S


Eyebrows!


Product: Skinfood Black Bean Eye Brow Pencil
How I use it: Fill in sparse areas of brows and blend with spoolie end.
Color: #2 Black Grey


Now, Eyeliner to make my eyelids look even!


Product: Kat Von D ink! Liner (Felt tip)
How I use: Line the top lash line and bring line straight outwards.
Color: Trooper (Black)


Can't leave with chapped lips!


 Product: Tony Moly Petite Bunny Gloss Bar
How I use: Apply to lips.
Color: #4 Juicy Cherry


Finally set the makeup!


Product: The Body Shop Vitamin E Face Mist
How I use: Follow the directions and spray all over face. Fan face to help dry.
Color: Colorless but has a rose scent.


Those are all the products I'm currently using for my everyday makeup. My skin changes from being Combo to dry in the colder months to being Combo to Oily during the hotter months. Generally products I use stay the same unless I go to a more formal event. The only two things that do change from time to time are my lip products and how I set my makeup. I am going to be posting a new video on my YouTube channel on Thursday so watch out for that!


Subscribe to my YouTube!


See you guys next week! ♡

Tuesday, January 6, 2015

A Piece of Advice: Choosing Classes in College

Hi everyone!

I'm currently a college student and I've been in college since September 2012. I've been going to the college I'm currently attending since Spring 2013.

At first I was going along with my mom's plan for me to be a nurse but now I'm trying to get into the Diagnostic Ultrasound program at my school.
The program itself is only two years and there are only six prerequisites.
If I had plan accordingly and passed all my classes in one try, I probably would've been graduating in 2017.

But no.... at this rate, I'll probably graduate in 2018.


If you don't want to end up like me and stay in college more than you actually need or plan to then here are some helpful tips I've learned throughout my college years.


  • Know what you're going to major in!
    • Knowing your major is a serious thing and will determine how long you'll be in school for. Well, that and what you passed in high school. There are people I know who chose a major but then end up switching it to something way different. Right then and there you're wasting both time and money. I mean don't get me wrong, if you choose to switch majors once or even twice is fine, that just means your interests changed. But don't be a person who switches from teaching to healthcare, to business. None of your previous classes will be able to fulfill your prerequisites. Also for some schools, you have to officially declare your major before your third or so year. So, be sure you know what you're majoring in!
  • Make sure you go to a counselor!
    • This is SO important! I didn't go to one because I thought since I have a friend that did running start, that I would know how to plan out my classes if I have her with me. Counselors can help with class planning and with questions your friends might not know the answer to. If you fail a class, you can go to them for options on how to get through that class so you can reach completing your prerequisites.

  • Have your Prerequisites memorized or written down.
    • Memorizing or writing down your prerequisites is very helpful especially when your planning or choosing what classes to take. Keep in mind that some classes require you to take a different class before taking that one. Not knowing your prerequisites isn't a good thing because then you'll choose classes by what you want to learn not what you need to learn. For example, my first quarter I chose to take Japanese instead of taking math. Sure I refreshed my limited Japanese but I now have a wasted credit from that class
  • Do your research on professors.
    • This helps make sure you know how hard or helpful a professor is before you take a class. The site I use is: ratemyprofessor.com. This site lets people rate the professor based on helpfulness, clarity, and easiness. It also shows what the average grade people get in the class. I try to choose the professors with overall rating that are close to 4.0. The only downside (or what can be a downside) is that the results of the professor show reviews from all the classes they teach.
  • Be sure the class you want is available during the quarter.
    • The worse thing to happen is that when you're registering at the end of the quarter and find out the class you want to take next quarter is only available in the current quarter. Now you have to wait a whole year until you can take that class. What do I mean by this? For example, at my school one of my prerequisites is Physics 100 which is only available during fall quarter.
  • Get help right away!
    • The most scariest and worst thing to happen to any student is finding out at the end of the quarter that you're either not going to pass the class or that your grade isn't good enough to get into your prerequisite class. Everybody is going to tell you this and now I'm going to tell you this, get help RIGHT AWAY. There was an instant that I didn't look for help until the end of the quarter and I ended up dropping the class which is bad because now I will forever have a W (for withdraw) on my transcript. It's not bad to have W's on your transcript, as long as you don't have too many and if you retake the class and do really good the next time. So, DO NOT wait until later to ask for help. Once you realize you're having trouble find a tutor, ask your professor, or go to a learning center. Learning centers are just that, you go and get help with the subject you're having trouble on, it's like a group tutoring session.
Choosing classes in college is actually pretty fun because you can schedule who you take and what time you take the class so that it fits around your schedule. The university I went to during my very first quarter of college had class options where you go to class for two and half hours but the class is only a couple days a week. If you choose that kind of class, don't become lazy to show up during the days you actually have to go.

What you get done in high school is important as well, I didn't realize that until my senior year like most people. But be sure you're ready. I'll post another "Piece of Advice" on tips for those of you guys still in high school. Be on watch for that one!

Hope this was helpful! ♡